
 Log out
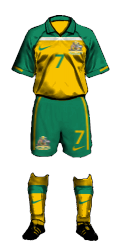
Australia
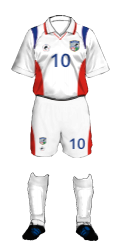
Chinese Taipei
2
Intercontinental Cup qualification match
Saturday, January 4, 2025
Soccer Stadium
Spectators: 80,000
Half-time: 1:0
Saturday, January 4, 2025
Soccer Stadium
Spectators: 80,000
Half-time: 1:0
0
| SHOTS | SET PIECES | FOULS/CARDS | |||||||||||||||
| Team | BP | ST | SW | CK | FK | PK | FC | YC | RC | SO | OF | ||||||
| 55.66% (55.86%) | 5 (3) | 7 (4) | 4 (2) | 5 (2) | 0 (0) | 7 (5) | 1 (1) | 0 (0) | 0 (0) | 2 (2) | |||||||
| 44.34% (44.14%) | 2 (0) | 4 (2) | 1 (1) | 2 (1) | 0 (0) | 16 (5) | 3 (1) | 0 (0) | 0 (0) | 6 (3) | |||||||

SUMMARY
| 1st half | ||||||
| 14' |

|
|||||
| 35' |

|
|||||
| 43' |
|
|||||
| 2nd half | ||||||
| 50' |

|
|
||||
| 50' |
|
|
||||
| 50' |
|
|
||||
| 52' |
|
|||||
| 58' |
|
|||||
| 88' |
|
|||||
FORMATION

|

|
STATISTICS
| Player | Min | G | A | ST | SW | FC | YC | RC | Rat | |
| G | 90 | 0 | 0 | 0 | 0 | 0 | 0 | 0 | 67 | |
| LD | 90 | 0 | 0 | 0 | 0 | 0 | 0 | 0 | 72 | |
| CD | 90 | 0 | 0 | 0 | 1 | 0 | 0 | 0 | 77 | |
| CD | 90 | 0 | 0 | 0 | 0 | 0 | 0 | 0 | 68 | |
| RD | 90 | 0 | 0 | 0 | 0 | 4 | 0 | 0 | 70 | |
| LM | 90 | 0 | 0 | 0 | 1 | 0 | 0 | 0 | 78 | |
| CM | 90 | 0 | 0 | 1 | 2 | 0 | 0 | 0 | 74 | |
| CM | 90 | 0 | 1 | 0 | 1 | 0 | 0 | 0 | 81 | |
| RM | 90 | 1 | 0 | 3 | 0 | 0 | 0 | 0 | 71 | |
| CF | 90 | 1 | 0 | 1 | 1 | 1 | 1 | 0 | 212 | |
| CF | 90 | 0 | 0 | 0 | 1 | 2 | 0 | 0 | 173 | |
| 0 | 0 | 0 | 0 | 0 | 0 | 0 | 0 | 0 | ||
| 0 | 0 | 0 | 0 | 0 | 0 | 0 | 0 | 0 | ||
| 0 | 0 | 0 | 0 | 0 | 0 | 0 | 0 | 0 | ||
| 0 | 0 | 0 | 0 | 0 | 0 | 0 | 0 | 0 | ||
| 0 | 0 | 0 | 0 | 0 | 0 | 0 | 0 | 0 | ||
| 0 | 0 | 0 | 0 | 0 | 0 | 0 | 0 | 0 | ||
| Player | Min | G | A | ST | SW | FC | YC | RC | Rat | |
| G | 90 | 0 | 0 | 0 | 0 | 0 | 0 | 0 | 69 | |
| LD | 50 | 0 | 0 | 0 | 0 | 1 | 0 | 0 | 66 | |
| CD | 90 | 0 | 0 | 0 | 1 | 1 | 0 | 0 | 63 | |
| CD | 50 | 0 | 0 | 0 | 0 | 1 | 0 | 0 | 66 | |
| RD | 90 | 0 | 0 | 0 | 0 | 1 | 0 | 0 | 61 | |
| LM | 90 | 0 | 0 | 0 | 0 | 1 | 1 | 0 | 74 | |
| CM | 90 | 0 | 0 | 0 | 0 | 1 | 0 | 0 | 70 | |
| CM | 90 | 0 | 0 | 0 | 0 | 4 | 1 | 0 | 68 | |
| CM | 90 | 0 | 0 | 0 | 1 | 1 | 0 | 0 | 62 | |
| RM | 90 | 0 | 0 | 0 | 0 | 3 | 1 | 0 | 71 | |
| CF | 50 | 0 | 0 | 0 | 2 | 0 | 0 | 0 | 154 | |
| 40 | 0 | 0 | 0 | 0 | 1 | 0 | 0 | 67 | ||
| 0 | 0 | 0 | 0 | 0 | 0 | 0 | 0 | 0 | ||
| 40 | 0 | 0 | 1 | 0 | 0 | 0 | 0 | 72 | ||
| 0 | 0 | 0 | 0 | 0 | 0 | 0 | 0 | 0 | ||
| 0 | 0 | 0 | 0 | 0 | 0 | 0 | 0 | 0 | ||
| 0 | 0 | 0 | 0 | 0 | 0 | 0 | 0 | 0 | ||
| 40 | 0 | 0 | 1 | 0 | 1 | 0 | 0 | 143 | ||
TACTICS IN THE MATCH
| 1st half | 2nd half | Tactics | 1st half | 2nd half |
| Very high | Very high | Match importance | Very high | Very high |
| Possession football | Long ball | Style of play | Possession football | Normal |
| L M R | L M R | Tendency of attacks | L M R | L M R |
| Hurry up | Delay play | Intensity of play | Delay play | Normal |
| Normal | Normal | Aggressiveness | Normal | Aggressive |
| Often | Often | Offside trap usage | Sometimes | Sometimes |
| Clearing the ball out of danger | Clearing the ball out of danger | Style of play in defense | Normal | Clearing the ball out of danger |
MAN OF THE MATCH

BALL POSSESSION
 Defense: 19.84%
Midfield: 25.26%
Offense: 10.55%
55.66%
|
6.92%
5.92%
6.04%
4.04%
6.88%
5.42%
8.86%
8.00%
7.94%
9.06%
8.46%
7.67%
3.25%
0.97%
4.44%
2.21%
2.86%
1.05%
|
 Defense: 15.38%
Midfield: 24.74%
Offense: 4.23%
44.34%
|
TEAMS' STRENGTH
| Australia | |
| Goalkeeping | |
| Defense | |
| Midfield | |
| Offense | |
| Total | |
| Chinese Taipei | |
| Goalkeeping | |
| Defense | |
| Midfield | |
| Offense | |
| Total | |
Copyright © 2007-2025 - POWERPLAY MANAGER, s.r.o. - All rights reserved
Contact - Terms of Service - Privacy Policy - Cookies settings - Site map
Advertising on PowerPlay Manager - Become our partner!
Partners: www.tennismania.com - www.biathlonmania.com - www.skijumpmania3.com - www.athleticsmania.com - www.wintersportsmania.com - www.summersportsmania.com
[all: 91ms / php: 57ms / db: 34ms ]
Web server: WB1